If you have a construction project which requires a solar-powered time-lapse camera, then look no further than Burgess Technologies. We have been providing 4K ultra HD solar time lapse cameras into construction projects around the world for over 8 years. Many time-lapse applications require the use of an off-grid set up, simply because the camera’s position is not near a power source, and if you have never set up a 12V solar system before, you may be left to feel a little overwhelmed. This blog post will cover the technology we use, including the camera, networking hardware and solar kit. We will explain how everything sets up and go over pricing.
Solar panel time lapse camera
12V Battery Cabinet & Solar Panel

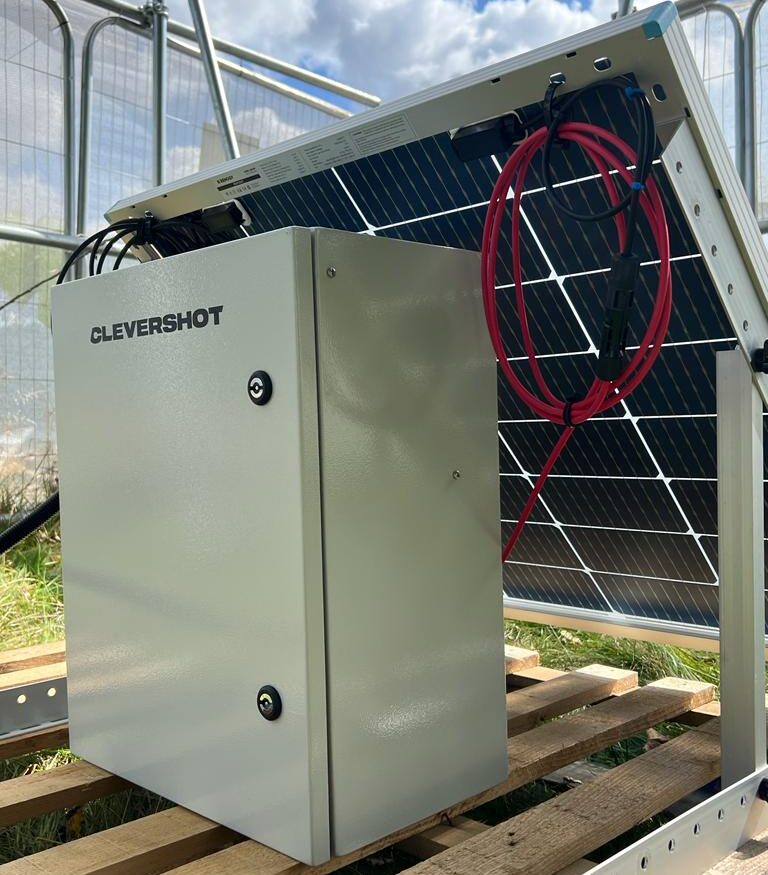
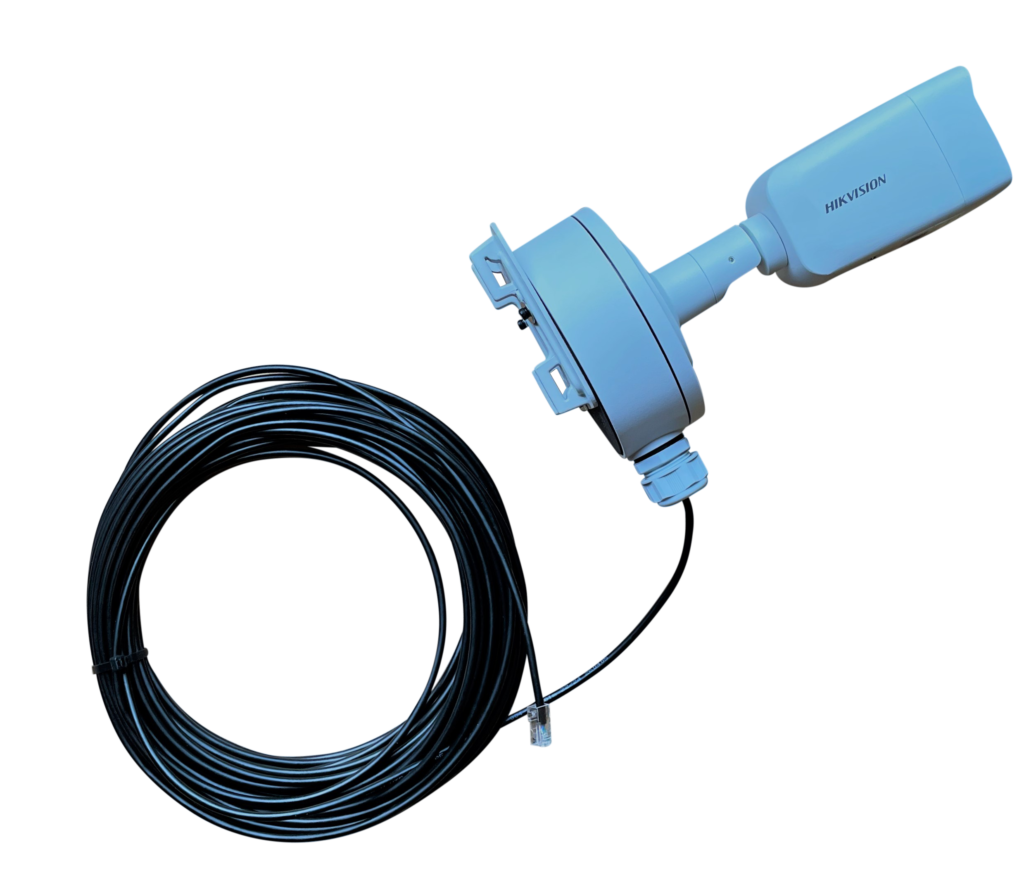
Your networking hardware and 12V battery are housed in a Steel Cabinet, this is all pre-built by Burgess Technologies. On site, you simply connect the battery and solar panel, a quick install that can be completed in under 60 minutes.

FIRST - VERIFY
NO POWER SOURCE

Just a few points first on power, with the powered system we build, it’s only our 4G box that needs to be near power, the camera can be situated some distance away. The camera connects back to the 4G box and powers from a data cable, so the camera can be up to 300 feet away from the power source. Are there site cabins available? These usually have power, and our time-lapse cameras can also run off generators. If now power is available to tap into, you need our solar powered time lapse camera.

Outdoor project time-lapse camera for construction and building sites.

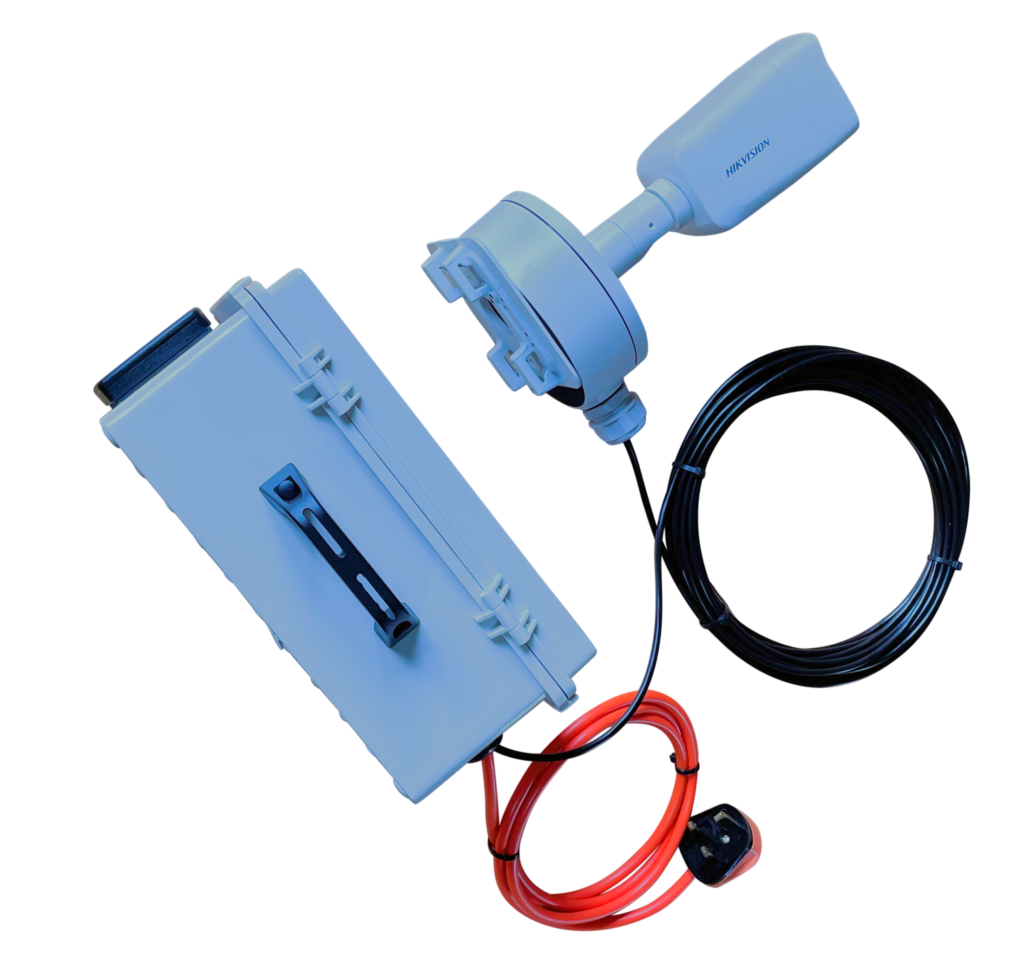
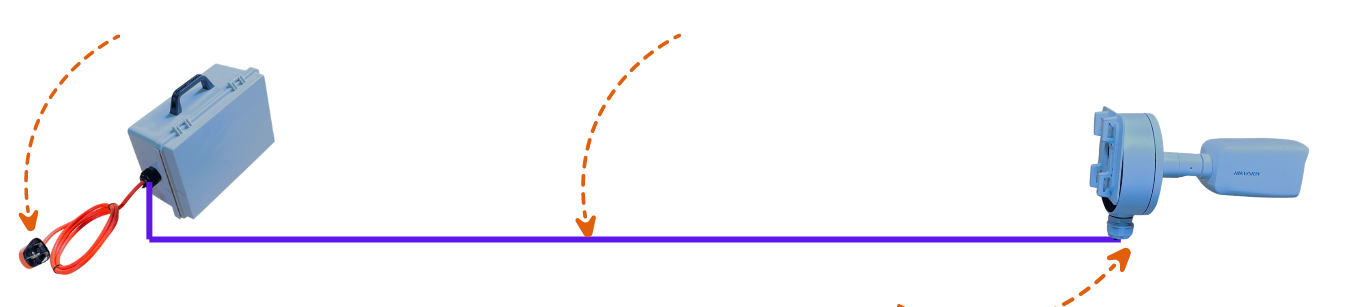
POWERED SYSTEM EXAMPLE SET UP

Before you opt for solar, check to see if there is any power available, it can be some distance from the cameras position.

SOLAR POWERED TIME-LAPSE CAMERA
THE KIT

You need to budget around £500 for your 12V solar kit. It will include a steel battery cabinet, this is for housing your 12V battery, and it also includes your networking hardware. You will need a solar panel, depending on if the time-lapse project is through winter or summer, you will need a 100-150 watt panel. A mount for your solar panel will also be required, along with a solar charge controller and cabling.
KIT LIST
solar time lapse camera off grid

12V SOLAR TIME-LAPSE
THE SET UP

Next, let’s cover what we include in our pre-build for your solar powered time lapse camera, and what you will need to do on site. The good news is we build everything for you, so when you get to the construction site, there is not much work to do. Many of our solar powered time lapse clients can install the system in under 1 hour. When you get to site, place the battery cabinet in its best position, and then mount the panel. Typically, the panels would be ground or pole mounted. Mounting them to the ground is the easiest way. If the site needs the solar panel fixed to a pole, then we can provide you with solar panel pole mounts.


After the cabinet and solar panel is in place, next it’s onto the wiring up. In our pre-build we set up all the wiring within the battery cabinet. This includes wiring the time-lapse camera’s POE injector and cellular router to the solar charge controller. We also set up the battery cables into the solar charge controller. The only thing left you to do is connect the solar panel cables into the PV input terminals on the solar charge controller, this is something that has to be conducted last, and not something we can do in the pre-build.

12V SOLAR
CALCULATION

When we are specifying the solar kit, the 2 main parts being the battery and solar panel, we first need to work out the total power draw of the connected hardware. The 3 x components which draw power are the POE injector, which powers the cameras, the cellular 4G router and the time lapse cameras. The typical power draw for our 4K time lapse system is around 8 watts. Let’s see what that looks like on a solar calculator.


On the below example, you will see we have inputted 8 watts of system power for the solar powered time lapse camera, over 24 hours a day, equals 192Wh, which stands for watt-hours. You will also notice we have done the calculations on the worst case scenario. We are saying there is only 3 hours of sun per day, which is taking into consideration winter time, and we have over specified the system by 100%. The suggested battery size is 32-64ah (amp hours) and we use lead acid type batteries so we double the suggested 12v battery size. What does this give us: Solar Panel: 150 watts
Battery – 90ah

Solar Calculations

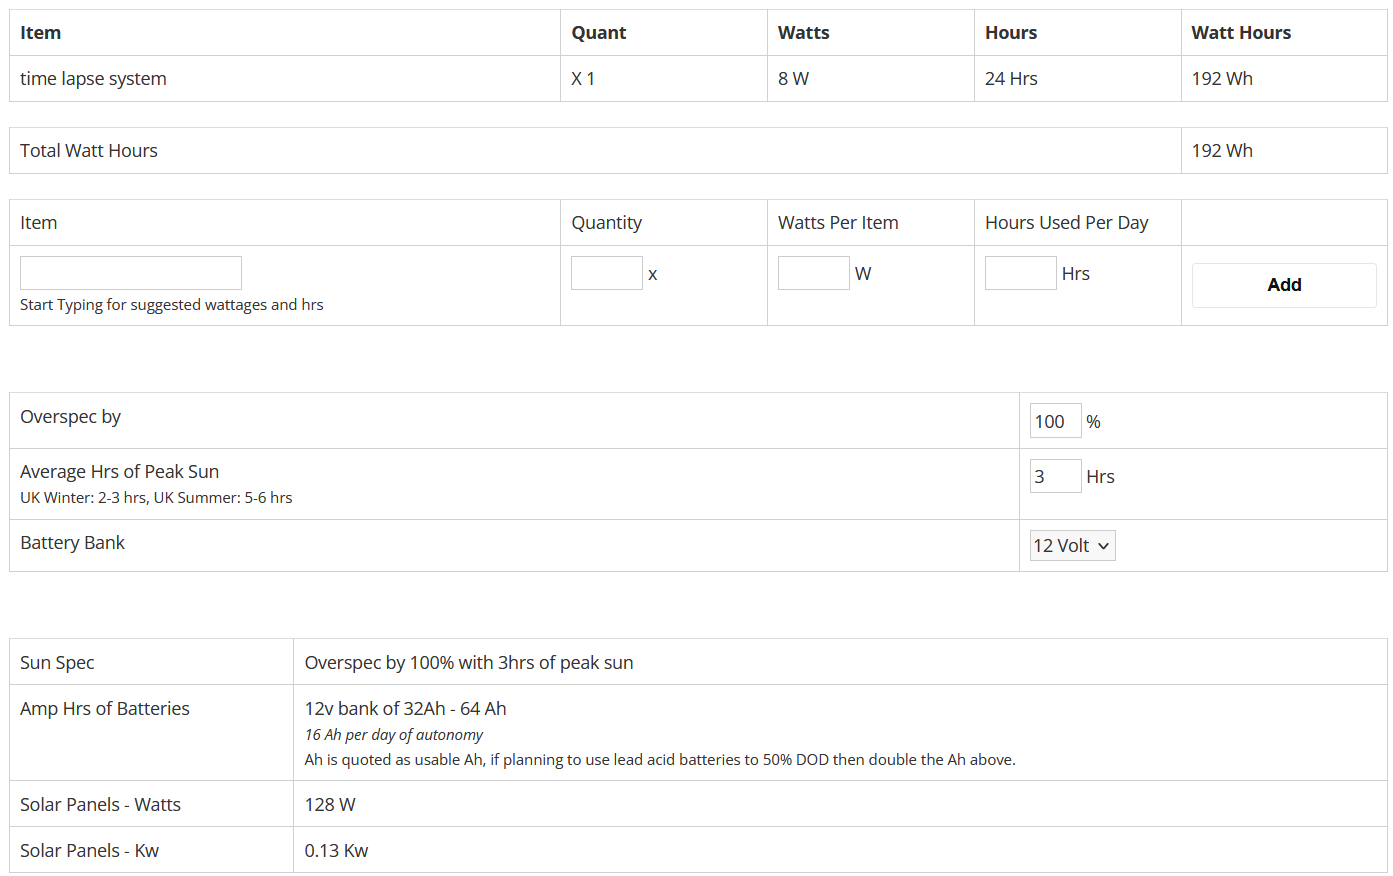
We calculate based on worst-case scenarios, considering winter conditions.
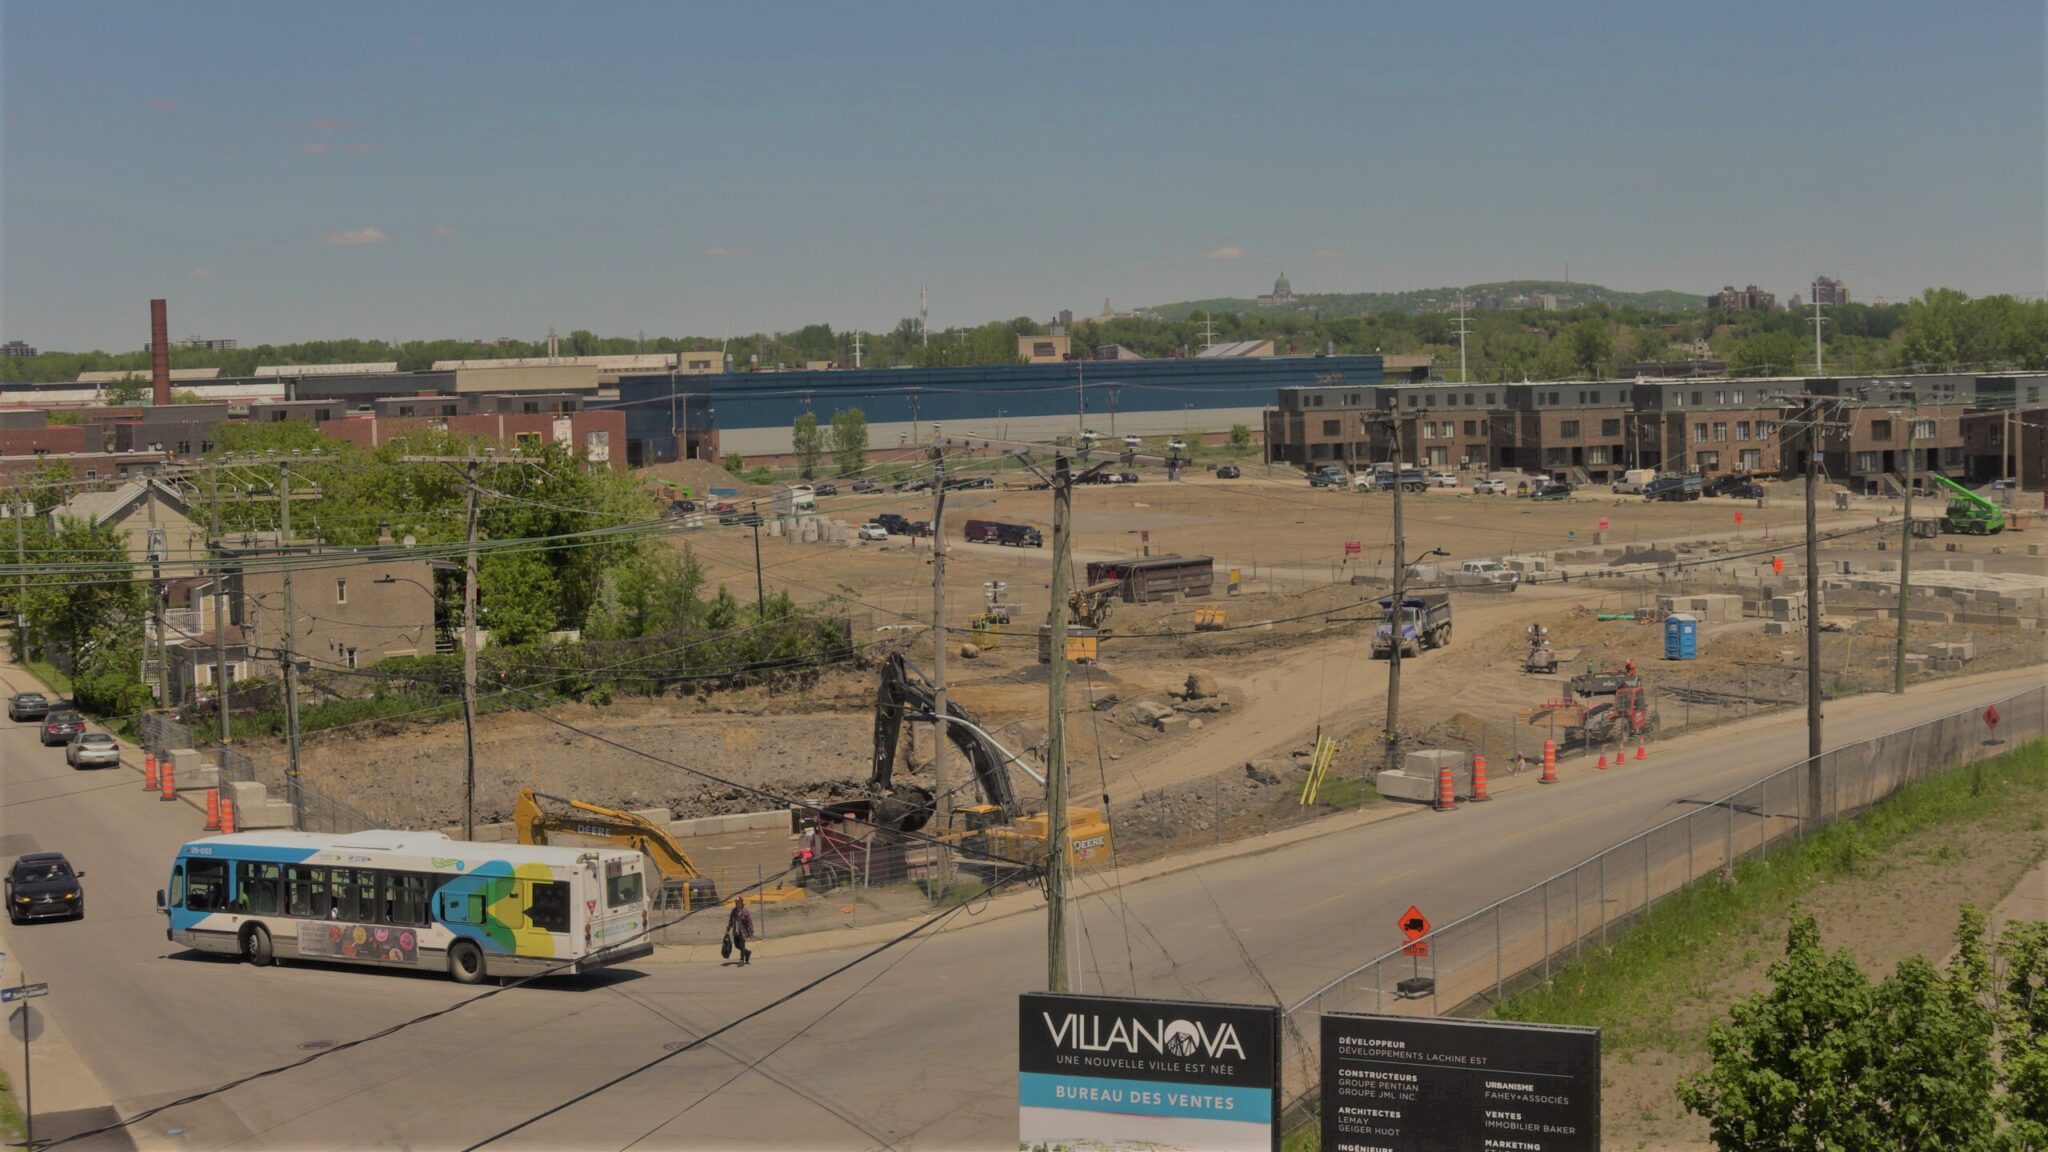
CAN WE MAKE THE SOLAR KIT SMALLER?
Yes we can, the above workings are based upon the solar-powered time-lapse camera being operational 24/7, but for time-lapse applications you don’t need to run the systems 24 hours a day. Most construction sites run around 10 hours per day. What this means is we can switch the load output off at night, this helps to conserve the battery. So, how do we do this? We set up a load output timer schedule on the 12V solar charge controller. We set it up, so the load is only outputting when the time lapse schedule is on, for example 7:30am to 17:00p, any time outside that the solar charge controller switches the load output off.
THE CAMERA
4K ULTRA HD
We have covered the solar system set up, and solar calculations. Now let’s have a look at the rest of the hardware which makes up this powerful remote managed 4G time-lapse system. The camera we provide is 4K ultra HD in resolution. A robust outdoor ready camera that is designed to be in operation for years.


The camera is IP67 rated and handles the harshest of environments. Like all the time-lapse hardware we provide, the camera is pre-configured to send images to your cloud folder and remote web-portal as soon as it receives power. It’s also pre-configured to the high speed 4g router, this allows us to log in remotely, and help with any support requests like a change to the schedule.
fit out 4g 4k time-lapse camera system
REMOTE WEB-PORTAL
Your captured images from the solar time lapse systems are sent to your remote cloud server folder, and the Burgess Technologies remote web-portal. Simply log in through the URL we send you, and you and the client can access and monitor the construction progression remotely.
RECAP
The initial step is to determine whether mains power is completely unavailable. Remember, with our standard powered system, it’s only the 4G box that needs to be directly next to power, the camera can be up to 300 feet away, connected to the 4G box on an outdoor data cable. The powered system can run off 110v and standard mains voltage. Many time lapse cameras power from on site generators, even if the generator went off every night, and back on in the morning, the camera system would auto boot up and continue capturing images. If solar is a must, then our system is at a good price point, and it can be set up in under an hour.
4k solar-powered time-lapse camera

VILLANOVA

New build project in Canada. Burgess 12v solar time lapse system.
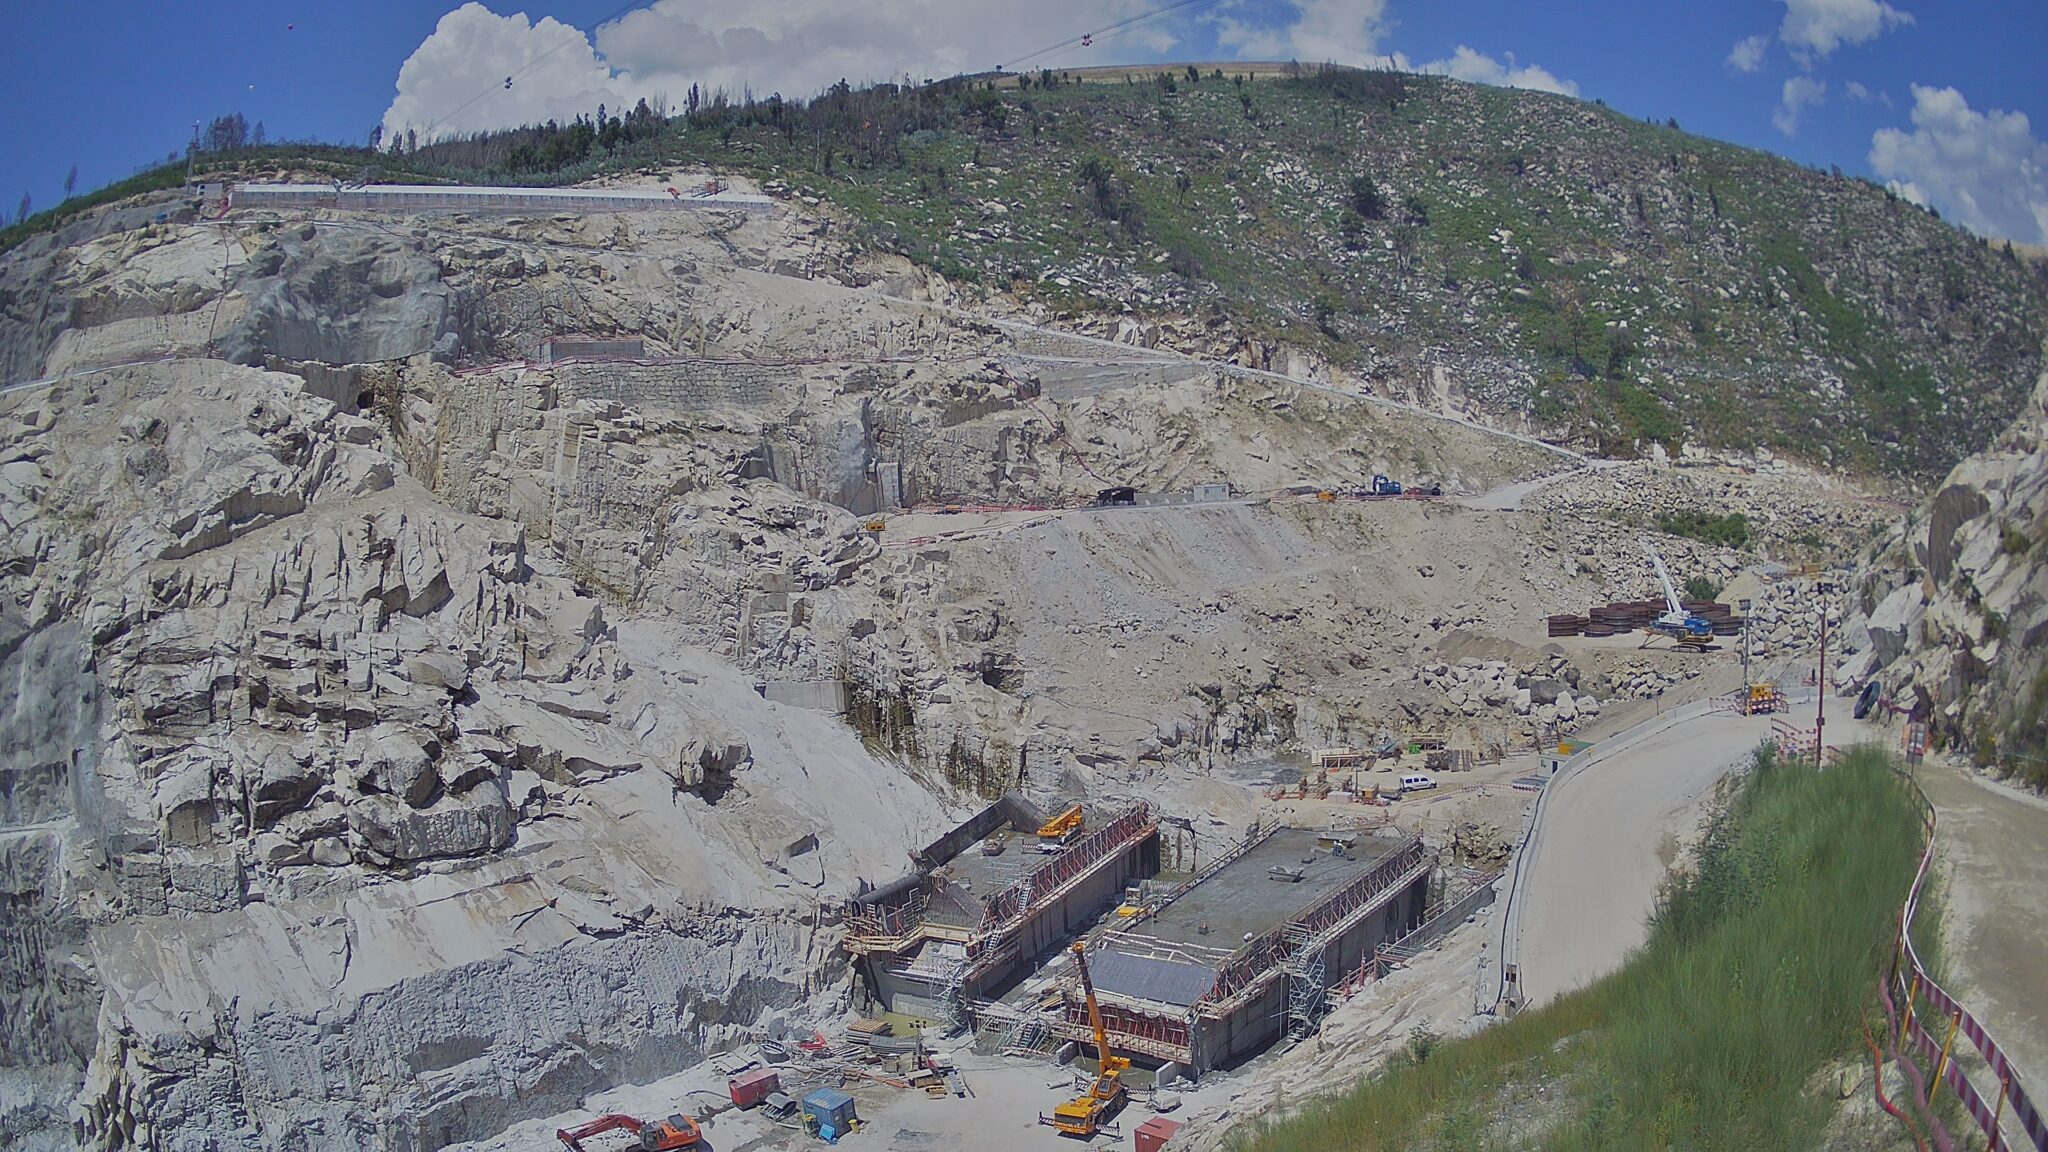
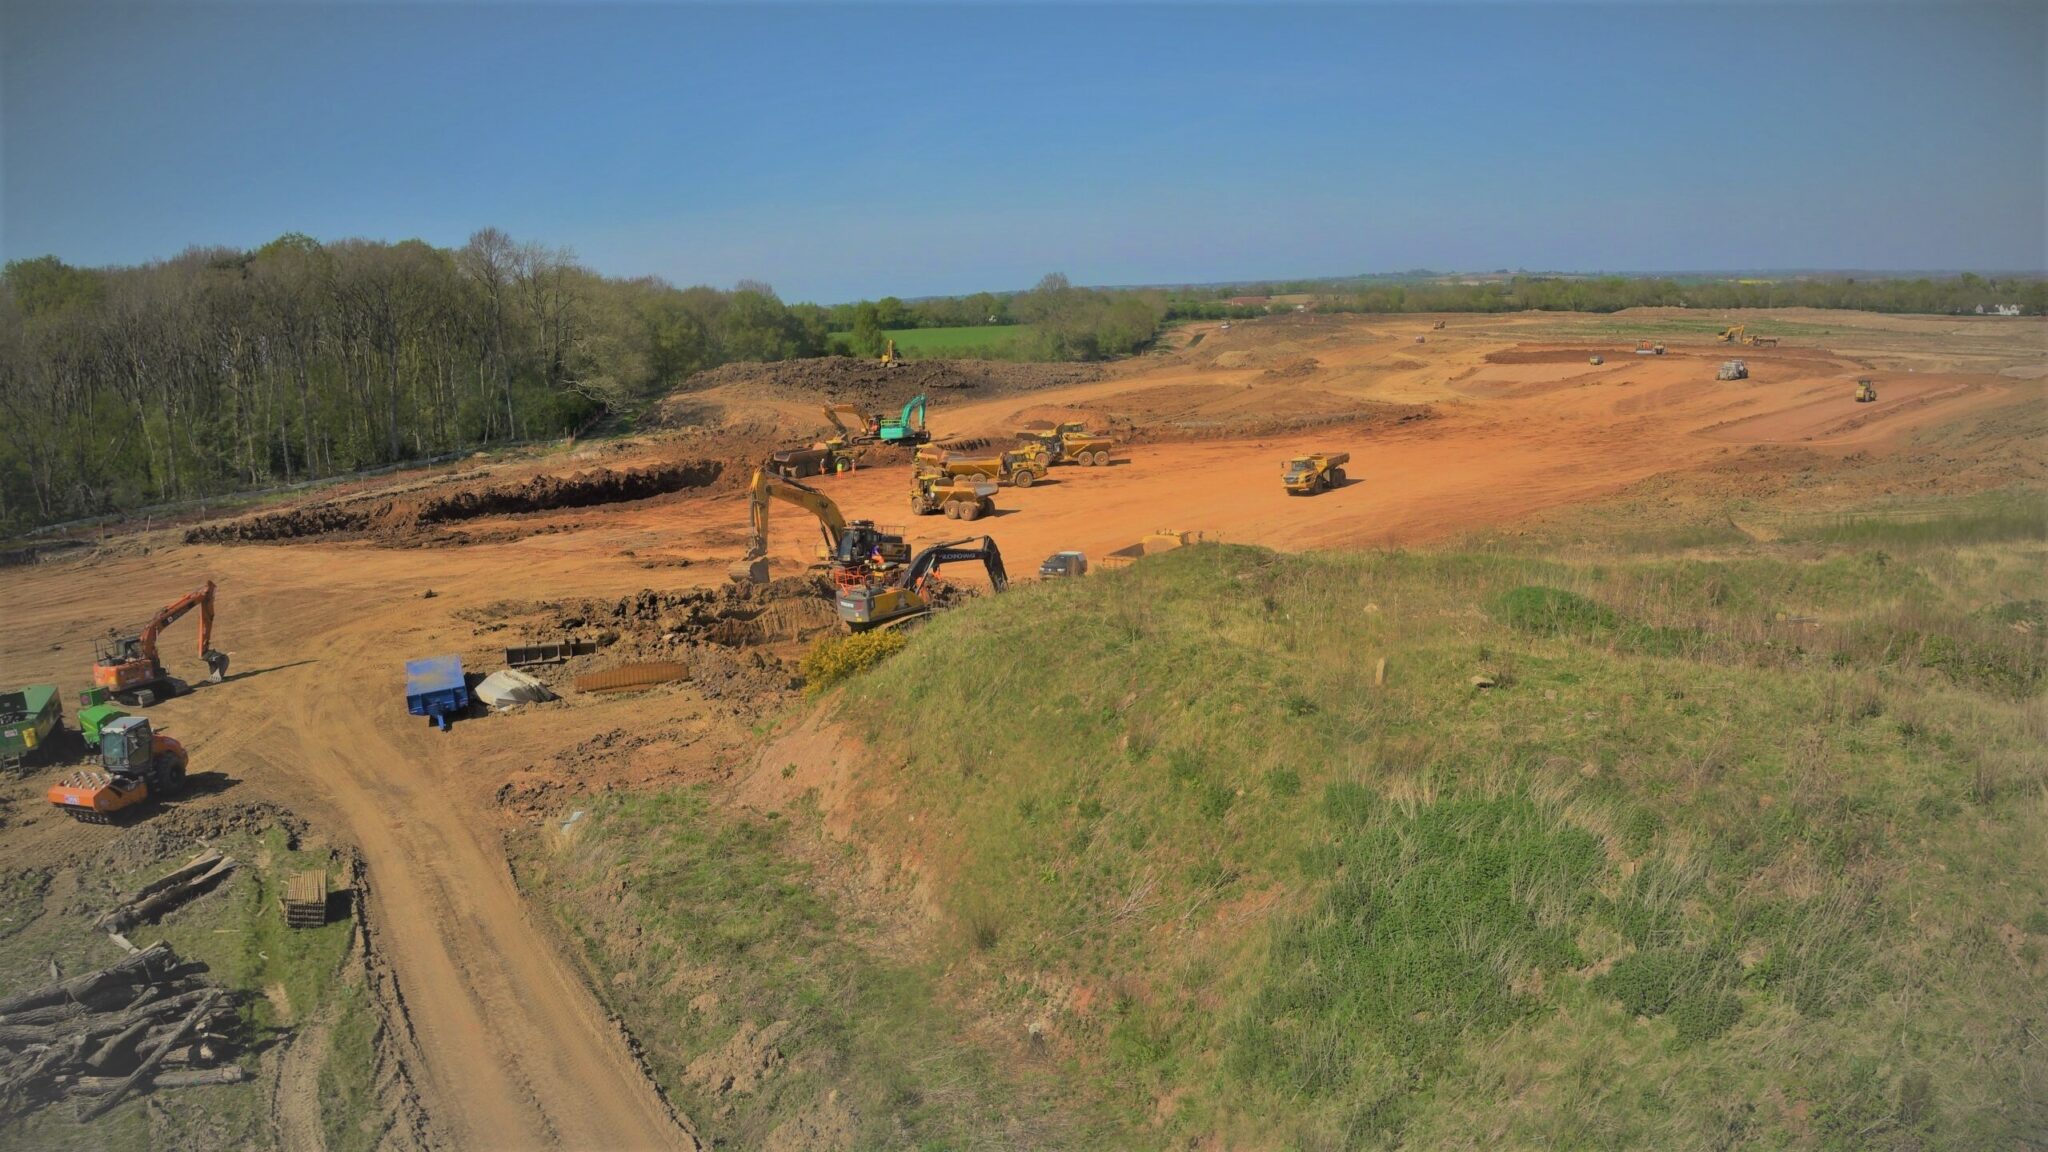
solar panel time lapse set up

QUARRY PROJECT

Huge 10 x camera site in Portugal. Burgess 12v solar time lapse system.
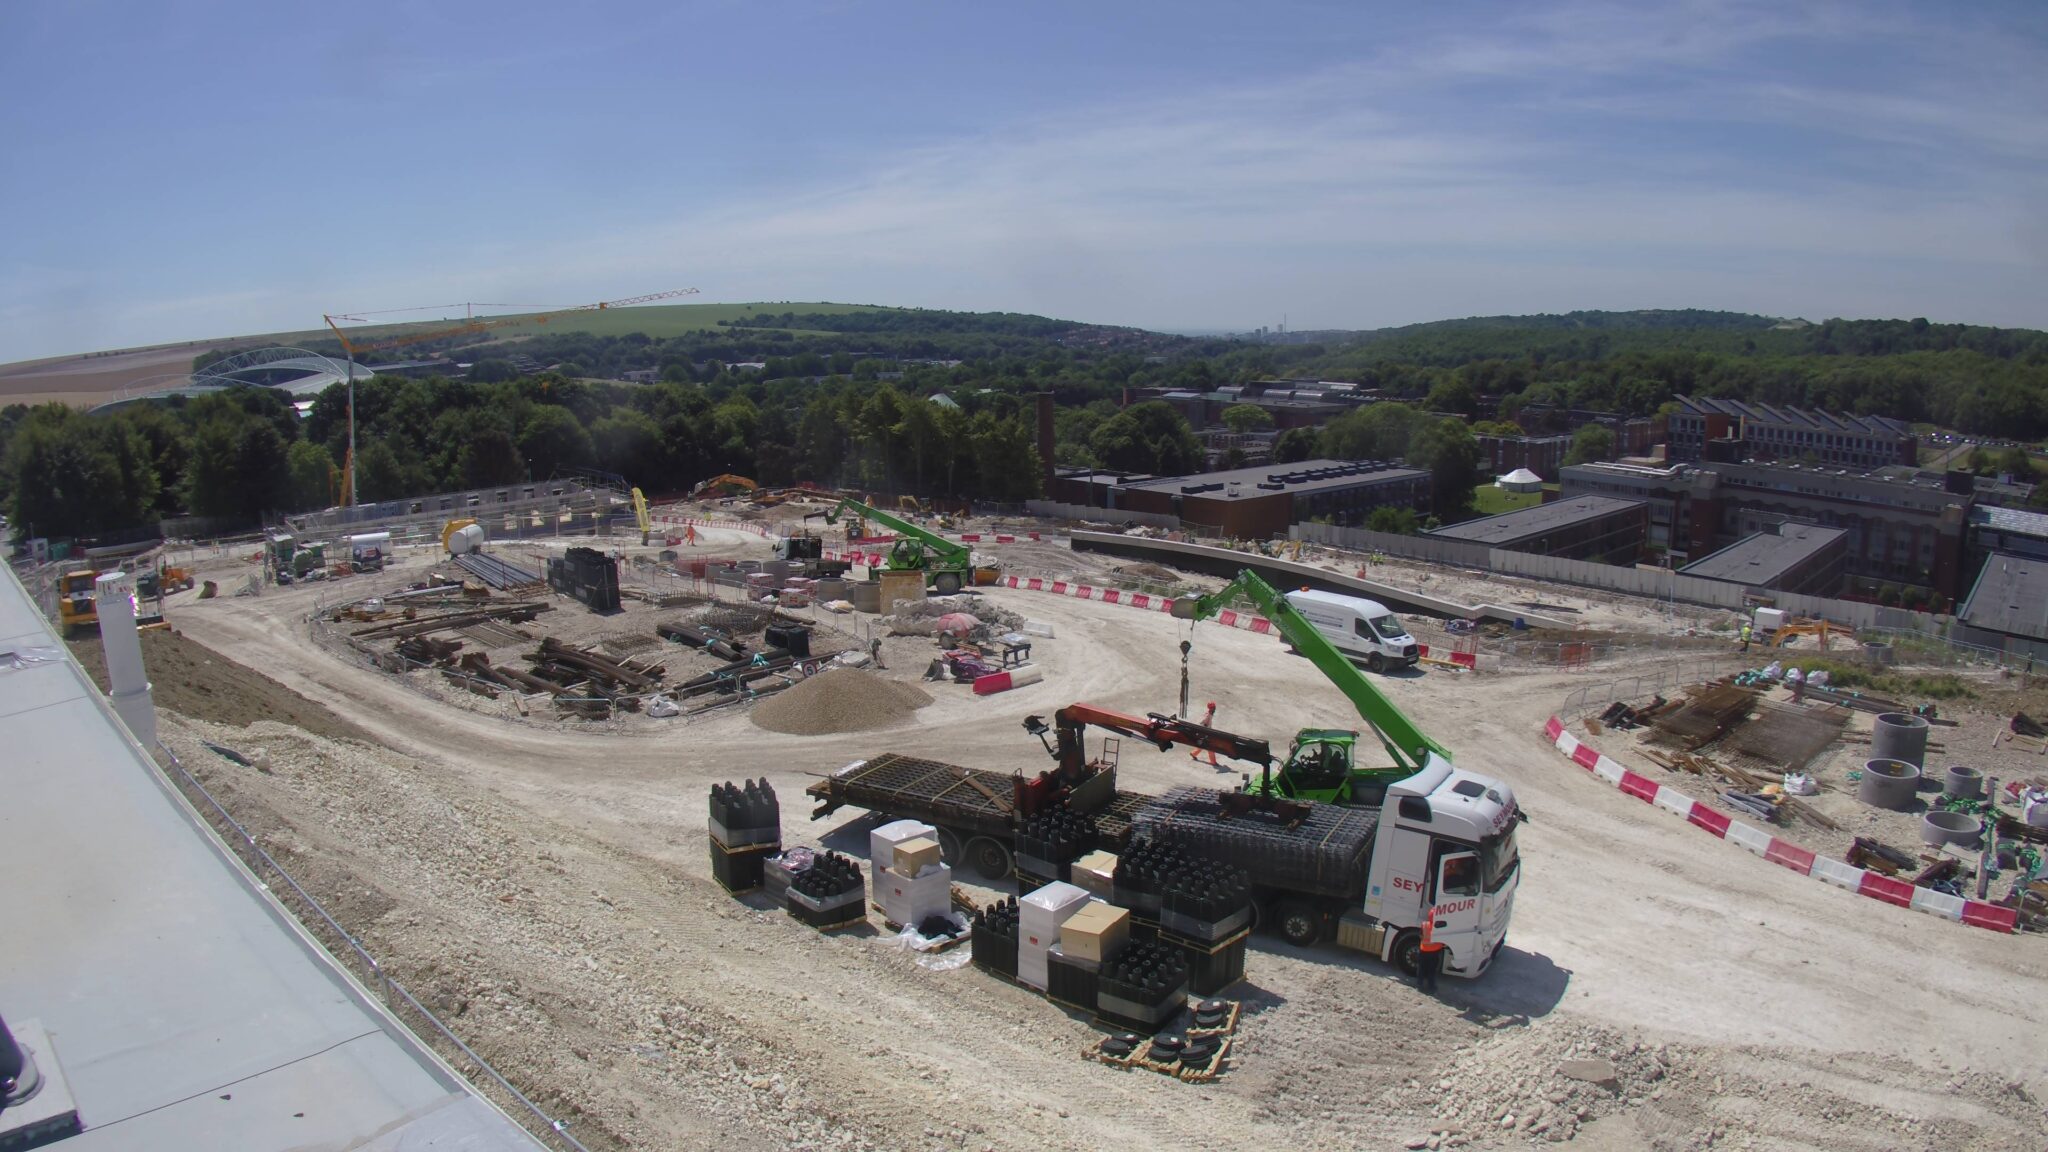
time-lapse camera on solar power

BALFOUR BEATTY

University build in London. No solar panels, 12v battery swap set up.

12v battery time-lapse system

HORIBA MIRA

New build project in the UK. Burgess 12v solar time lapse system.

Feedback from our clients.

Fantastic service, great quality products and support. I cannot rate Paul and his team high enough for their professional services and expert knowledge.

- John Zammit , Owner, Absolute Photography
LETS TALK
We're here to provide the assistance you need, no matter what your time-lapse application might entail. Our remote-managed systems have been successfully installed in 22 countries, and with over 8 years of experience, we can offer valuable pre-sales information regarding pricing, installation, and ongoing support. Contact our Sales & Support Manager, Paul, directly at 07496 835651 or via email at [email protected]. Alternatively, feel free to utilize the convenient text-to-chat pop-up to speak with Justine or one of the team.

Let's Talk